
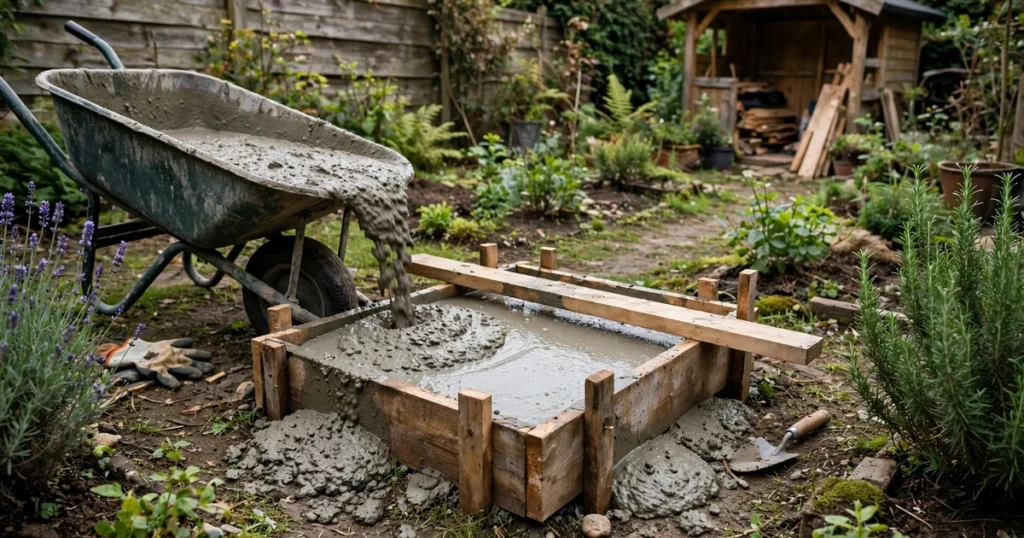
A small concrete pad is one of the best first concrete jobs. It is small enough to mix by hand, and useful for a shed, an air conditioning unit, or a stair landing. It is also easy to get wrong. A pad on soft soil, without a base, or without a slope will crack, settle, or hold water.
Direct answer: Dig down for the slab plus a compacted base, set level timber forms with a slight slope away from buildings, lay mesh for most pads, mix and pour in one steady session, screed level, float, edge, and broom finish, then cure for at least 7 days. A 4 inch pad suits light loads. Heavy equipment and hot tubs need 5 to 6 inches and stronger reinforcement.
Plan the pad before you dig
Decide what the pad must carry and how big it must be. An air conditioning unit needs a pad slightly larger than its feet, with room for service access. A shed needs a pad at least as large as its floor. A hot tub needs a pad for the full tub plus steps. Measure the equipment, not just the space you fancy.
Check the ground and drainage. Avoid low spots that collect water, and keep the finished pad above surrounding ground where possible. Slope about a quarter inch per foot away from any building. Check for buried cables before digging, and check local rules for size and setback.
Tools and materials
- String line, stakes, tape, level, and spray paint.
- Spade, wheelbarrow, hand tamper, and rake.
- Straight 2 by 4 boards for forms, plus screws and stakes.
- Crushed stone for the base, plus wire mesh.
- Bagged or ready mix concrete, mixer, and screed board.
- Hand float, edger, and soft broom for finishing.
- Plastic sheeting and water for curing.
Buy materials before you mix anything. Count bags with the table below, then add one spare bag. Running short mid pour is worse than having one bag left over.
How thick should a small pad be
| Pad use | Thickness | Reinforcement |
|---|---|---|
| Air conditioning or generator pad | 4 inches | Wire mesh for most pads |
| Shed or garden store, light use | 4 inches | Wire mesh |
| Stair landing or walkway pad | 4 inches | Wire mesh |
| Hot tub or heavy equipment | 5 to 6 inches | Rebar grid, check maker guidance |
| Vehicle or trailer pad | 5 to 6 inches | Rebar grid |
Four inches is a floor, not a target, for light pads. If the soil is soft, recently disturbed, or subject to frost heave, a thicker pad and a deeper base are cheap insurance. For vehicle loads, do not guess. Use 5 to 6 inches with rebar, and check local code. A pad that is too thin will crack under a load it was never meant to carry.
How many bags do you need
Work out volume first. Multiply length by width by thickness in feet to get cubic feet. Divide by the bag yield to get bag count, then round up and add about 10 percent for waste. An 80 lb bag yields about 0.60 cubic feet, a 60 lb bag about 0.45 cubic feet, and a 40 lb bag about 0.30 cubic feet. About 45 bags of 80 lb mix make one cubic yard.
| Pad size at 4 inches | Volume | 80 lb bags before waste | With 10 percent waste |
|---|---|---|---|
| 3 ft by 3 ft | 3.0 cubic feet | 5 bags | 6 bags |
| 4 ft by 4 ft | 5.3 cubic feet | 9 bags | 10 bags |
| 4 ft by 6 ft | 8.0 cubic feet | 14 bags | 15 bags |
| 8 ft by 8 ft | 21.3 cubic feet | 36 bags | 39 bags |
| 10 ft by 10 ft | 33.3 cubic feet | 56 bags | 61 bags |
Bagged mix is practical up to about 1 cubic yard, roughly 45 bags of 80 lb mix. Beyond that, ready mix is faster and usually cheaper per yard. A 10 foot by 10 foot pad at 61 bags is past that crossover, so get a ready mix quote first. See our bags vs ready mix guide and bags per cubic yard guide.
Step by step: pour a small pad
1. Mark out and excavate
Mark the pad outline with paint or string. Dig down for slab thickness plus base thickness, plus room for the form to sit. For a 4 inch slab on a 4 inch base that finishes 2 inches above ground, dig about 6 inches below ground level in the pad area, and clear extra soil outside the marks for formwork. Remove roots, soft soil, and loose debris.
2. Compact the base
Level the soil, dampen it lightly, and compact it with a hand tamper. Add crushed stone in layers of about 2 inches, compacting each layer. A firm, level base stops settlement and helps drainage. Do not skip compaction on clay or recently disturbed soil, because that is where pads settle and crack first.
3. Set the forms
Build the form from straight boards, with the inside measurement equal to the pad size. Stake the outside every 2 to 4 feet, and check level and slope. Set the slope at about a quarter inch per foot away from buildings. Check diagonals for square, and brace well.
4. Place reinforcement
Cut wire mesh slightly smaller than the form and lay it on chairs or small supports so it sits in the middle of the slab, not on the base. Mesh lying on the ground does almost nothing. For heavier pads, tie a rebar grid in the same way. Keep steel at least 2 inches from the form edges where possible, so it stays covered by concrete.
5. Mix, pour, and screed
Mix to the maker instructions. Add water slowly and mix fully. Concrete that is too wet is weak, so do not add extra water for an easier pour. Pour from the far end, spread with a rake, and screed level with a straight board on the form edges.
6. Float, edge, joint, and broom
Float the surface once the water sheen fades. Edge the perimeter to round the rim and reduce chipping. Cut control joints where needed, following our control joint spacing guide. When the surface firms up, pull a soft broom lightly across it for grip. Do not overwork it.
Curing and loading times
| Stage | Typical timing |
|---|---|
| Remove forms | After about 24 hours, with care |
| Foot traffic | 24 to 48 hours |
| Light equipment | After about 7 days |
| Vehicles and heavy loads | After about 28 days for full strength |
Keep the pad damp and covered with plastic for at least 7 days, misting lightly each day in dry weather. Concrete gains strength while it stays damp. See how to cure concrete and drying and curing times for the full timetable.
Dry pour: should you try it
Dry pouring means spreading dry bagged mix in the form, screeding it, then misting it over several hours. It suits very small, low load pads such as a firewood store. It does not suit heavy loads, vehicle pads, hot tubs, or heavy frost areas, because water may not reach every part evenly. For anything you rely on, mix properly first.
Frequently asked questions
Can I pour a pad straight on soil?
No, not if you want it to last. Compact the soil, add a crushed stone base, and use forms. A pad on loose soil settles unevenly and cracks early.
Do small pads need reinforcement?
Most do. Wire mesh suits light pads and helps control cracking. Heavy pads need rebar. Very small, light pads on firm soil are the only common exception.
How long before I can use my pad?
Foot traffic after 24 to 48 hours, light use after about 7 days, and heavy loads after about 28 days. Keep it damp and covered for the first week.
Can I pour a pad in one day?
Yes, for a small pad. Excavation, base, forms, pour, and finish can fit in a day, but curing takes a week and full strength takes about 28 days.
What if I run short of concrete mid pour?
That is why you add a spare bag and a waste allowance. A cold joint from a delayed top up weakens the pad. If you must stop, finish at a joint line, not in the middle.
Should I seal a small pad?
Sealing can help with stains and frost resistance, but wait until curing is complete and follow the sealer maker guidance. A broom finish already gives good grip outdoors.
Conclusion
A good pad is mostly preparation. Measure the load, dig for slab plus base, compact in layers, set square forms, and keep steel off the ground. Mix correctly, screed, float, edge, and broom, then cure patiently. Do those steps in order and a weekend pad can serve for years.
Sources
- Intermountain Concrete Specialties: How to Pour a Small Concrete Pad
- Everyday Home Repairs: How To Pour A Small Concrete Pad
- DIY Concrete Calculator: Concrete Pad Calculator
- Gaugeyard: How Many Bags of Concrete Do You Need?
- Dry Pour Concrete Slab Method
About the author
Kaleemullah Formulas use standard geometry and published bag yields; sources are linked in each article.