
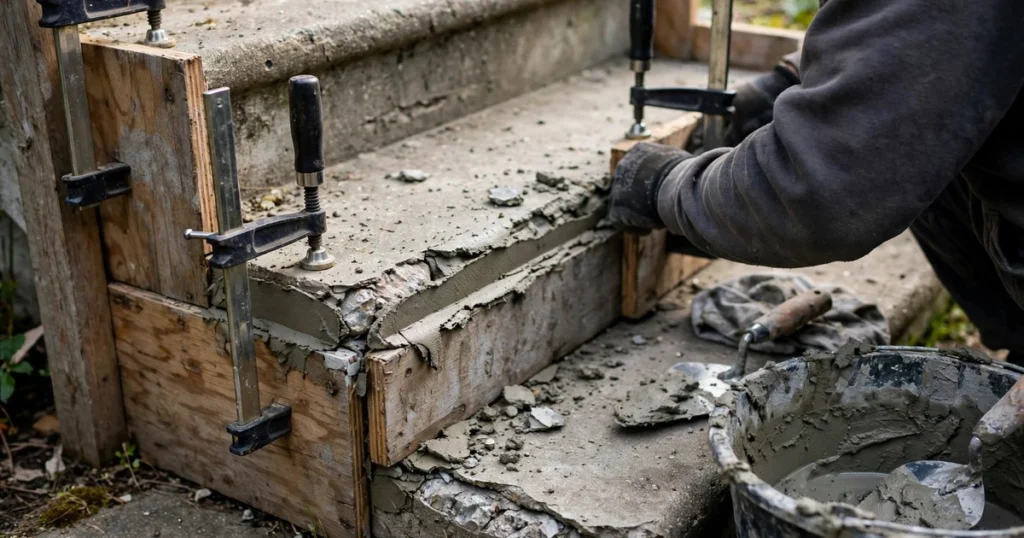
Can you repair crumbling concrete steps? Yes. Cut back to sound concrete, carve a V-groove along the damaged edge, build simple timber forms, and rebuild the nose with a polymer-modified repair mortar, then cure it moist for 24 to 48 hours. The old “cannot be repaired” advice is out of date. This guide covers the repair-or-replace decision, the right material for each damage depth, and the full step-by-step for rebuilding a step nose that lasts.
Repair or replace? Decide first
Use what you can see and feel to decide:
| What you see | Repair it | Replace it |
|---|---|---|
| Surface flaking, chipped edges, base feels solid | Yes, patch and resurface | |
| Broken nose or missing chunk, surrounding concrete sound | Yes, rebuild with forms | |
| Section rocks when stepped on or has sunk | Yes, replace the section | |
| Rusting steel exposed and crumbling around it | Yes, replace (get a pro if unsure) | |
| Crack runs right through and is still moving | Yes, replace; patching a moving crack fails |
A repair is only as good as what it sticks to: a resurfacer is a surface overlay, not structural work, so sections that rock, sink or keep moving must be replaced (Engineer Fix). Flaking treads with intact edges are a surface spalling job; see our concrete spalling repair guide for that case.
Where the old guides go wrong
Two top-ranking guides steer readers wrong:
Dummies (2016, still ranking) teaches an epoxy-only method: glue the broken piece back on, and if the concrete has crumbled to dust, it says it “cannot be repaired” and you must hire a contractor for “a big job”. That was pre-modern-repair-mortar advice. Per manufacturer guidance, remove unsound material back to solid concrete and rebuild the edge with a form. You do not need the original piece. Epoxy only works when the broken chunk is intact and fits tightly.
Angi tells readers to apply “new concrete, usually in the form of Portland cement”. Neat Portland cement shrinks as it cures and bonds poorly in thin sections. You need a repair mortar: QUIKRETE’s Re-Cap resurfacer is polymer-modified and shrinkage-compensated by specification, which is why it survives thin repairs where plain cement would crack and let go.
Pick the right material for the damage depth
QUIKRETE’s official FAQ gives this matrix; no competitor uses it. Match the product to the damage depth (QUIKRETE is a US brand; UK readers should look for the same product classes at a builders’ merchant).
| Damage depth | Use this | Notes |
|---|---|---|
| Hairline cracks | Concrete caulk or repair sealant | Cracks only, not missing chunks |
| Under 3/8 in (10 mm) | Concrete resurfacer | Feather edge 1/16 in to 1/2 in max; two-coat method |
| 3/8 in to 2 in (10 to 50 mm) | Sand / topping mix | The workhorse for rebuilt noses and edges |
| 1 to 2 in build-up | Add concrete bonding adhesive | For thicker build-ups |
| Under 1 in build-up | Add acrylic fortifier | Use one or the other, not both |
| Deep rebuilds | Concrete mix in forms | For the biggest repairs |
Why steps crumble in the first place
Step noses take a beating that flat slabs never see:
- Impact damage: the sharp front edge is the thinnest, weakest part of the step. Dropped tools and boots chip it.
- Freeze-thaw: water soaks into the pores, freezes, expands and pops the surface off. The classic cause of spalled treads in cold climates.
- Thin edge cover: older steps were often cast with little concrete over the nose reinforcement, so the edge was weak from day one.
- De-icing salts: salts worsen freeze-thaw damage by increasing freeze cycles and drawing more water in.
The cause shapes the fix: impact damage just needs a solid rebuild, while freeze-thaw damage means sealing the repair afterwards. If you ever replace steps in a freeze-thaw climate, specify air-entrained concrete, whose microscopic air bubbles give freezing water room to expand.
Step by step: rebuild a broken step nose
1. Assess and decide
Probe the damage with a screwdriver or cold chisel. Hard, solid surroundings mean repair. Sections that rock, sink, or damage deeper than about 50 mm over a wide area mean replace.
2. Remove unsound concrete and cut a V-groove
Chip away all crumbly or hollow-sounding concrete to solid material, then cut a V-shaped groove along the edge (wise-geek). The groove locks the repair in, far stronger than a flat butt joint.
3. Build the forms
Hold 2×4 boards flush against the riser face and sides, braced with stakes so wet mortar cannot push them out (wise-geek). The front board’s top edge sets the new nose profile. Level everything before mixing.
4. Prep the surface
Clean out all dust, then dampen the old concrete. Some products want a saturated surface-dry condition: damp, no standing water (gritandhome). Brush on bonding agent; do not let it dry to a slick film unless the spec allows.
5. Mix small batches and pack the repair
Mix only what you can place before it stiffens. Press the mortar firmly into the groove and forms to kill voids, slightly overfilling. Voids are the top cause of early failure, so pack in layers and work out air pockets.
6. Shape the nose and match the finish
Strike off level with the form tops, then recreate the rounded nose with an edging tool (gritandhome). Match the existing finish: broom the patch at thumbprint-hard if the old treads are broomed (Lowe’s).
7. Cure it properly
Keep the patch moist 24 to 48 hours under plastic sheeting or regular misting (Engineer Fix). Rapid drying cracks the surface and too much mix water weakens it, so follow the bag’s water ratio exactly. No foot traffic for 48 hours (craftingwithconcrete); full cure can take up to a week (wise-geek). The product label has the final word.
Worked example: one typical step nose
For one step nose about a metre wide with 25 to 50 mm of rebuild, a single bag of sand/topping mix plus a bottle of bonding agent is usually plenty. Check the bag’s stated coverage at your depth before buying, and mix in small batches. If the broken chunk is intact and fits tightly, a two-part concrete epoxy can reattach it; anything crumbled must be cut back to solid concrete first.
Repair cost vs replacement cost
No verified source gives exact figures, so here is the honest qualitative picture. A repair costs a bag of mix, a bonding agent and basic tools: a fraction of replacement. Full replacement means breaking out the old step, building new forms, pouring and finishing fresh concrete, and waiting out the full cure, usually a contractor job. So repair where the base is sound; save replacement for genuinely failing steps. Our DIY concrete mistakes guide covers the errors, like bad weather timing and weak mixes, that turn a cheap repair into an expensive redo.
Stop it happening again
Once cured, seal the steps to slow water absorption, the root of freeze-thaw damage; an unprotected repair fails the same way. Do not work below about 10°C: cold slows the set and weakens the bond (Lowe’s). Avoid hot, dry, windy days too, which accelerate the set and risk surface cracking (Engineer Fix). For timing the cure around the weather, see our guide to curing concrete.
Frequently asked questions
Can you pour new concrete over old concrete steps?
Yes, with a bonding agent, but it will not fix a failing base. A rocking or moving step makes the overlay fail too (Engineer Fix).
How long before I can walk on the repaired steps?
No traffic for 48 hours (craftingwithconcrete); full cure can take a week (wise-geek). The product label overrides general guidance.
My treads are flaking but the edges are fine. Is this the same job?
No. Flaking treads are surface spalling, fixed by resurfacing rather than rebuilding. See our concrete spalling repair guide.
Can I just glue the broken chunk back with epoxy?
Only if the chunk is intact and fits tightly. Crumbling concrete must be cut back to solid material and rebuilt with mortar and forms; epoxy cannot bond dust.
Can I repair steps in cold weather?
Avoid working below about 10°C (Lowe’s). Protect fresh repairs from frost for the first 48 hours.
Should I seal or paint the steps afterwards?
Seal them once fully cured; a penetrating sealer slows the water absorption behind freeze-thaw damage. Never paint instead of fixing crumbling concrete.
Conclusion
Crumbling concrete steps are very repairable. Cut back to sound concrete, groove the edge, form it, pack it with the right mortar for the depth, and cure it moist. Reserve replacement for steps that rock, sink or keep moving. Work in decent weather, seal the finished job, and the repair will outlast the damage that caused it.
Sources
- QUIKRETE Re-Cap specification sheet: https://cdn.littlehardware.com/items/docs/Quikrete_103028811_Specification_Sheet.pdf
- QUIKRETE official FAQ, repair depth matrix: https://www.Quikrete.com/ContactUS/FAQs.asp
- Lowe’s QUIKRETE Re-Cap instructions: https://www.lowes.com/collections/QUIKRETE-Repairing-Your-Driveway-Concrete-Resurfacer-Kit/GR_7120
- Engineer Fix on resurfacer limits and problems: https://engineerfix.com/how-to-use-quikrete-re-cap-concrete-resurfacer/ and https://engineerfix.com/common-quikrete-concrete-resurfacer-problems/
- wise-geek on V-groove and 2×4 form method: https://www.wise-geek.com/how-do-i-repair-concrete-steps.htm
- gritandhome on edging tools and prep: https://gritandhome.com/concrete-steps-flaking-or-spalling-patch-and-protect-them/
Last verified: October 2026.
About the author
Kaleemullah Formulas use standard geometry and published bag yields; sources are linked in each article.