
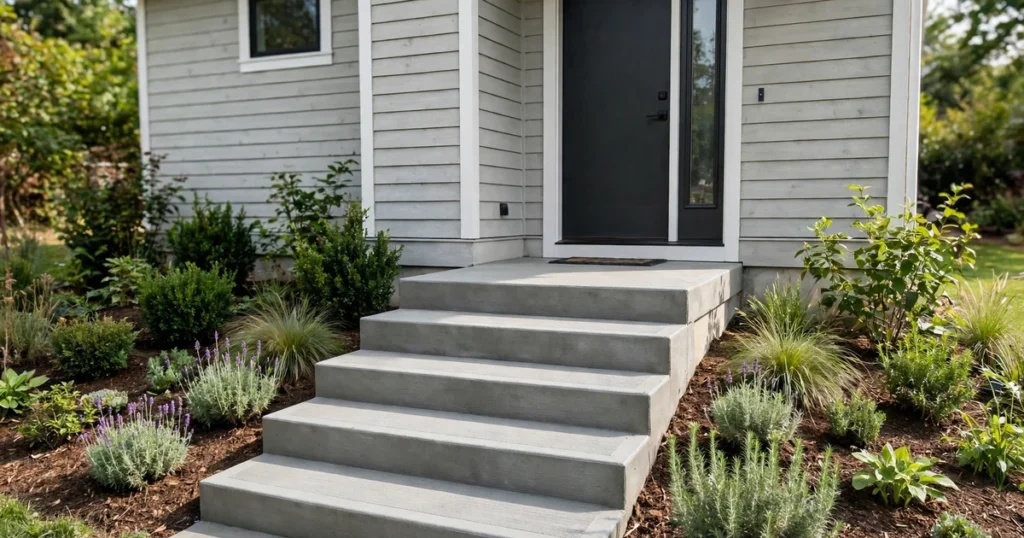
Concrete steps last for decades and suit any house style, but they are one of the hardest DIY concrete jobs: every riser must be level, every tread even, and the formwork must hold back a tonne of wet concrete. Built right, a flight of concrete steps is a weekend project for a confident DIYer. Built carelessly, it is a crooked, cracked hazard that costs more to remove than it did to pour. This guide covers planning, formwork, pouring, finishing and curing.
The short answer: how to build concrete steps
Measure the total rise from ground to landing, divide it into equal risers of about 7 to 7.5 inches, and give each tread at least 11 inches of depth. Compact a gravel base, build plywood side forms and riser boards, add rebar, then pour from the bottom step upward. Screed and broom each tread, keep the concrete damp for up to a week, and leave the forms until the concrete sets hard. Check local building rules before you start.
Step 1: plan the rise and run
Two words describe any stair: riser, the vertical face, and tread, the flat part you step on. Measure the total rise, the vertical distance from finished ground level to the top landing. Divide that figure by your chosen riser height to get the number of risers, rounding to a whole number, then divide the total rise by that number so every riser is exactly equal. Uneven risers are the most common fault in DIY steps and the most likely to trip someone.
Worked example: a total rise of 30 inches divided by 7.5 inches gives exactly 4 risers of 7.5 inches each. A total rise of 33 inches divided by 7.5 gives 4.4, so use 5 risers of 6.6 inches instead of 4 risers of 8.25 inches, which is too tall for most codes. The number of treads is always one less than the number of risers, because the top landing counts as the last tread.
| Dimension | Common rule | Why it matters |
|---|---|---|
| Riser height | 7 to 7.5 inches; max 7.75 inches (IRC) | Comfort, code |
| Tread depth | At least 11 inches | Safe footing |
| Riser uniformity | Within 3/8 inch across the flight | Trips |
| Top landing | At least 36 by 36 inches | Standing room |
| Width | At least 6 inches wider than the door each side | Room at the door |
Step 2: prepare the base
Mark out the footprint with stakes and string, then excavate for base and slab. Fill the excavation with compactable gravel, tamp it hard in layers, and check the level. Soft or loose fill under steps settles, and settled steps crack and tilt. On firm ground a compacted gravel base is enough; on soft ground, pour a 6 inch footing slab below grade first.
Step 3: build the forms
Forms are the mould that shapes the steps, and they take most of the labour. Cut the two side forms from 3/4 inch plywood, marking the stair profile on each sheet and cutting along the lines. Stand the sides in place, brace them with stakes every 12 inches, and fix a riser board across the front of each step using 2 by 8 lumber. Check every riser with a level and a tape: an error now is permanent later.
Brace generously. Wet concrete is heavy and pushes outward, and a blown form ruins the pour. Screw joints where you can for clean removal. Spray the inside faces with a release agent so the timber does not stick to the concrete. Add a chamfer strip for a neat nosing.
Step 4: add reinforcement
Steps need steel. A grid of rebar, typically 12 by 12 inches, tied at the intersections and held at least 2 inches clear of the form faces, stops cracks spreading and holds the flight together if the ground moves. Number 3 or number 4 bars suit most residential steps. Support the grid on chairs so it sits inside the concrete. For guidance on choosing between bar and mesh, see our rebar vs wire mesh guide.
Step 5: mix, pour and consolidate
For a small flight, bagged concrete mix and a hired mixer work well. For a larger flight, ready mix delivered by truck is faster and more consistent, though a small load may attract a short load fee of $40 to $100. Estimate volume first: tread depth x riser height x width per step, plus base slab, plus 10 percent waste. Our bags per cubic yard guide helps convert that volume into bags.
Pour from the bottom step upward, one step at a time. Spade into corners and tap the forms to release air. A honeycombed riser face, full of small holes, means the concrete was not consolidated enough. Work steadily: a long break mid-pour creates a cold joint between old and new concrete.
Step 6: finish the treads
When the concrete stiffens enough to hold a thumbprint, screed each tread flat, then float it smooth. Finish with a broom dragged lightly across each tread for grip: smooth outdoor steps are dangerously slippery when wet. Round the nosing with an edging tool. Do not overwork the surface or add water while finishing; both weaken the top layer. For curing times, see our concrete drying and curing times guide.
Step 7: cure and strip the forms
Keep the concrete damp for up to a week: mist it, cover it with wet hessian, or use a curing compound. Protect it from rain in the first day, because heavy rain can wash the surface. Remove riser boards once the concrete holds its shape, usually after a day or two, and rub down rough spots while still green. Avoid heavy loads until cured, and de-icing salts in the first winter.
What concrete steps cost
Published cost guides conflict, so treat every figure as a range. Poured steps are commonly quoted at $200 to $500 per step installed, putting a 3-step stoop at roughly $900 to $1,500. Precast units are cheaper, roughly $100 to $350 per step installed, but need exact measurements and help or machinery to place. These are US market figures; get local quotes for a UK project.
| Option | Cost per step (US guides) | Notes |
|---|---|---|
| Poured in place, pro installed | $200 to $500 | Custom fit, most labour |
| Precast unit, installed | $100 to $350 | Fast, exact measurements needed |
| DIY materials only | $100 to $500 per flight | Plus mixer hire |
| Removing old steps | $300 to $800 extra | More if reinforced |
Common mistakes to avoid
- Uneven risers: always recalculate so every riser is equal.
- Weak bracing: wet concrete blows out under-braced forms.
- Pouring on loose fill: compact the base properly first.
- Adding water during finishing: it weakens the surface layer.
- Skipping the broom finish: smooth steps are slippery when wet.
- Removing forms too early: the nosing chips or the concrete sags.
For more on what goes wrong in DIY concrete work, see our DIY concrete mistakes guide. If the steps serve a patio, check concrete patio thickness so the landing slab matches the flight.
Frequently asked questions
How many steps do I need?
Divide the total rise by about 7 to 7.5 inches, round to a whole number, then divide again so all risers are equal. Treads number one less than risers.
Can I pour concrete steps over dirt?
Only over compacted, stable soil on a gravel base. Loose fill settles and cracks the steps. On soft ground, use a footing slab below grade.
How thick should concrete steps be?
The flight is normally solid, with the base slab at least 4 to 6 inches thick. That solid mass is why a small flight uses more concrete than expected.
Do concrete steps need rebar?
Yes, beyond a single small step. A rebar grid holds the flight together and limits cracking. Keep steel at least 2 inches from the form faces.
How long before I can use new concrete steps?
Light foot traffic is usually fine after a day or two. Keep them damp for up to a week, and avoid heavy loads and de-icing salts at first.
Should I choose poured or precast steps?
Poured steps fit any shape and bond to the foundation, but need formwork skill. Precast steps are faster and cheaper, but measurements must be exact.
Conclusion
Concrete steps reward careful planning and punish rushing. Get the maths right, brace the forms well, compact the base, and pour from the bottom up. Broom for grip, cure properly, and the flight will last decades. If the flight is large, curved or tied to the building, get a professional quote too.
Sources
- Angi: How to Build Concrete Steps in Under 8 Hours
- Everything About Concrete: Building Concrete Steps
- DoItYourself: How to Make Steps with Concrete
- Slabcalc: Concrete Steps Cost (2026)
- Engineer Fix: How Much Do Concrete Steps Cost?
About the author
Kaleemullah Formulas use standard geometry and published bag yields; sources are linked in each article.