
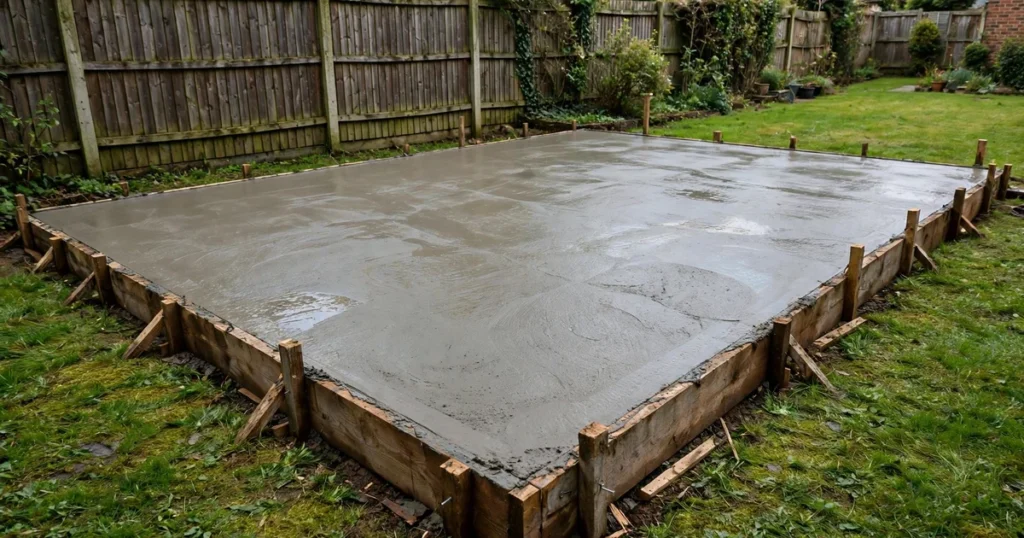
How to Build a Concrete Base for a Shed
A shed only lasts as long as the ground beneath it. Timber bearers on bare soil soak up moisture, rot from below and leave the shed leaning within a few winters. A concrete base fixes all of that. It gives the shed a flat, dry, permanent footing that keeps timber off the ground and spreads the load so the shed cannot sink.
This guide covers the full sequence plus real quantities for a standard UK shed, so you can order materials with confidence.
The Short Answer
A concrete base for a shed needs 100 to 150mm of compacted MOT Type 1 hardcore, a damp proof membrane and a concrete slab 100mm thick (150mm for a heavy workshop). A 3.2m by 2.2m base poured at 100mm needs 0.704 cubic metres of concrete, which is 61 bags of 25kg ready mix.
Why Concrete Beats Paving Slabs
Paving slabs shift independently, so the shed floor rocks. Gaps let water and weeds through, and within a few years the door starts jamming. A single poured slab behaves as one unit: it cannot rock, it sheds water, and it anchors the shed against wind lift. For any shed holding tools, bikes or a mower, concrete is the better investment.
How Thick Should the Base Be?
The slab should be 100mm thick for a normal garden shed. That covers tool sheds, bike stores and summer houses on reasonably firm ground. Step up to 150mm if the shed will carry serious weight: a workshop with a bench, a home gym with a rack and plates, or a ride on mower store.
Under the slab, lay 100 to 150mm of compacted MOT Type 1 hardcore. Soft or clay ground needs the deeper end of that range. The subbase spreads the load and stops the slab settling into soft soil. Going thicker than 150mm for the slab is rarely worth it. Stability comes from the subbase and good ground, not from extra slab depth.
What You Need
For a 3.2m by 2.2m base (sized for a 3m by 2m shed):
- MOT Type 1 hardcore: about 1.2 tonnes for 100mm depth (1.7 tonnes for 150mm)
- Damp proof membrane: 1200 gauge polythene, at least 4m by 3m
- Concrete: 61 bags of 25kg ready mix for a 100mm slab, or 91 bags for 150mm
- Formwork boards (150mm by 25mm timber), pegs and screws
- Plate compactor (hire for the day), spirit level, string line, shovel, wheelbarrow, rake, trowel and float
- A helper. Mixing and placing more than half a cubic metre of concrete alone is hard work.
Step by Step: Building the Base
1. Mark Out and Excavate
Mark out the base 100mm bigger than the shed on every side. A 3m by 2m shed needs a 3.2m by 2.2m base. The overhang stops roof runoff landing on bare soil at the wall line, which keeps the wall bases dry.
Dig to 200 to 250mm deep: 100mm for the subbase plus 100 to 150mm for the slab. Remove all turf, roots and loose topsoil down to firm undisturbed ground. Dig out any soft spots and backfill them with compacted hardcore.
2. Lay and Compact the Subbase
Spread MOT Type 1 in layers no thicker than 75mm, compacting each with two or three passes of the plate compactor. Thin layers are the secret: one thick layer stays loose underneath. Check levels as you go. Finish the subbase 100mm (or 150mm) below the top of your formwork. A slight fall of about 1 in 60 helps rainwater run off the finished slab.
3. Lay the Damp Proof Membrane
Roll polythene DPM over the compacted subbase, running it up the inside of the formwork a little. Overlap joints by at least 300mm and tape them. The membrane stops ground moisture rising into the concrete and stops the subbase sucking water out of the fresh mix, which would weaken the surface.
4. Build the Formwork
Set boards on edge around the perimeter, staked with pegs every 600mm. The top of the boards is your finished slab level, so get them level and straight, then screw the corners together. Check both diagonals match to confirm the rectangle is square.
5. Mix and Pour
Work from one end to the other. Mix each batch to the same consistency: stiff enough to hold its shape, wet enough to work. Tip it in, spread with a rake, and poke with a shovel to release trapped air. Screed the surface by dragging a straight timber across the formwork tops in a sawing motion, then float it smooth. Two or three passes is enough. Overworking brings water to the surface and leaves a weak, dusty finish.
6. Cure the Slab
Cover with polythene or damp sacking for at least three days, longer in hot weather. Concrete hardens by a chemical reaction that needs moisture. Keep foot traffic off for 48 hours and wait at least seven days before erecting the shed.
Worked Example: 3m by 2m Shed
Volume = length x width x thickness = 3.2 x 2.2 x 0.1 = 0.704 cubic metres.
One 25kg bag of ready mix yields 0.0117 cubic metres. So 0.704 / 0.0117 = 60.2, which rounds up to 61 bags.
| Slab thickness | Concrete volume | 25kg bags needed |
|---|---|---|
| 100mm | 0.704 m3 | 61 |
| 100mm, plus 10% waste | 0.774 m3 | 67 |
| 150mm | 1.056 m3 | 91 |
| 150mm, plus 10% waste | 1.162 m3 | 100 |
The waste allowance covers spillage, uneven ground and the odd batch that sets before you place it. Always round up. Running short mid pour leaves a cold joint, a weak line across the slab.
Subbase for the same base at 100mm: 3.2 x 2.2 x 0.1 = 0.704 cubic metres. Compacted MOT Type 1 weighs roughly 1.6 tonnes per cubic metre, so order about 1.2 tonnes (1.7 tonnes at 150mm depth).
To skip the arithmetic, run your measurements through our slab concrete calculator. For help choosing depth, see our concrete slab thickness guide.
Mistakes That Ruin a Shed Base
- Pouring onto soil with no subbase. The slab settles unevenly and cracks within a year or two.
- Skipping the DPM. Moisture wicks up and rots the shed floor from below.
- Making the base exactly the shed size. Rain drips off the roof and splashes back onto the timber. The 100mm overhang matters.
- Mixing too wet. Extra water makes concrete easier to pour but much weaker when set, and it shrinks more, which causes cracking.
- Building the shed the next day. A week of patience gives a far stronger base.
Frequently Asked Questions
How long does a concrete shed base take to build?
A weekend. Excavate and lay the subbase on day one, build formwork and pour on day two. Then leave the slab to cure for at least seven days before erecting the shed.
Can I pour a shed base in winter?
Yes, if the temperature stays above 5C during the pour and for 48 hours after. Cover the fresh slab with an insulating layer such as old carpet under the polythene. Never pour onto frozen ground.
Do I need reinforcement mesh?
For a normal garden shed on firm ground, no. A 100mm slab on a proper subbase is plenty strong. Add a sheet of A142 mesh if the ground is soft or the shed will carry heavy workshop equipment.
Should the base be bigger than the shed?
Yes, 100mm bigger on every side. The overhang keeps roof runoff off the soil at the wall line and gives you a small apron to stand on.
How do I stop the slab cracking?
Cracks come from a soft subbase, too much water in the mix, and drying out too fast. Compact in thin layers, keep the mix stiff, and cover the slab so it cures slowly.
Concrete volumes for common shed sizes (100 mm slab)
| Shed size | Slab size (100 mm extra each side) | Concrete at 100 mm | 25 kg bags (no waste) | 25 kg bags (+10% waste) |
|---|---|---|---|---|
| 2 m x 2 m | 2.2 m x 2.2 m | 0.48 m³ | 42 | 46 |
| 3 m x 2 m | 3.2 m x 2.2 m | 0.70 m³ | 61 | 67 |
| 3 m x 3 m | 3.2 m x 3.2 m | 1.02 m³ | 89 | 98 |
| 4 m x 3 m | 4.2 m x 3.2 m | 1.34 m³ | 116 | 128 |
| 5 m x 3 m | 5.2 m x 3.2 m | 1.66 m³ | 144 | 158 |
Slab sizes allow 100 mm extra on each side of the shed, the same margin as the worked example in this guide, so the 3 m x 2 m row matches it exactly. Always round up and confirm with your supplier.
Conclusion
Excavate to firm ground, compact 100 to 150mm of MOT Type 1 in thin layers, lay a damp proof membrane, build level formwork, pour a 100mm slab and keep it covered while it cures. For a standard 3m by 2m shed that means 0.704 cubic metres of concrete, or 61 bags of 25kg ready mix. Get the groundwork right and the slab will outlast the shed.
Sources
- BSI: BS EN 206, Concrete: specification, performance, production and conformity
- BSI: BS 8500, Method of specifying concrete
- The Concrete Society: Good Concrete Guides
About the author
Kaleemullah Formulas use standard geometry and published bag yields; sources are linked in each article.