
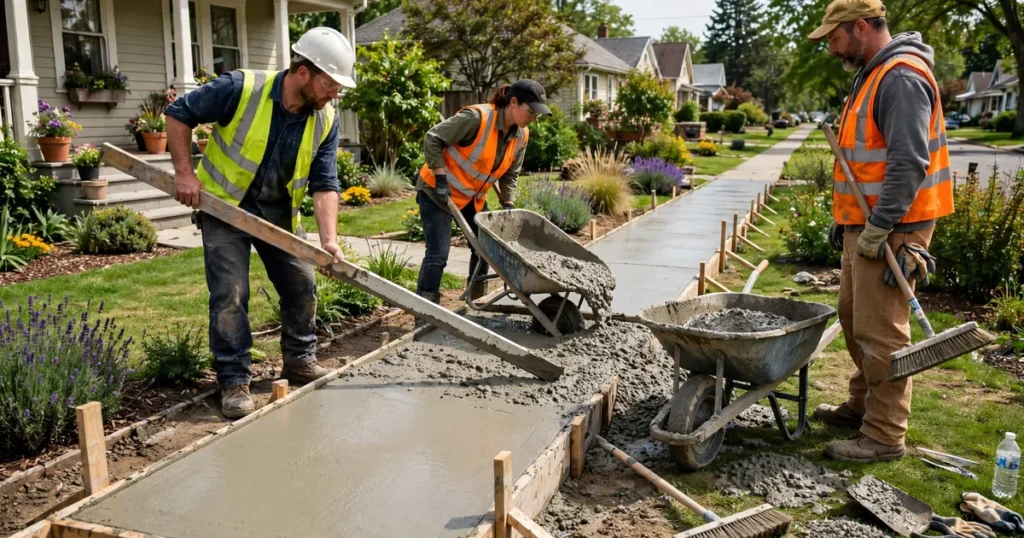
A concrete sidewalk gives you a firm, level path that lasts for decades when it is built well. It also stops muddy shoes, worn grass and puddles at the door. This guide shows you how to pour a concrete sidewalk step by step, from marking the route to curing the finished slab.
The direct answer
To pour a concrete sidewalk, mark the route, dig out the ground, build level forms, add and compact a gravel base, place mesh if needed, pour concrete 100 mm thick for a footpath, screed it level, edge and joint it, broom finish it, then keep it damp while it cures. A home path is usually 900 mm to 1200 mm wide. A public footpath needs local rules checked first, because width, slope and access rules may apply.
Plan the route first
Walk the route before you dig. Note where water runs after rain, where tree roots cross the line, and where the path meets a drive or a step. A gentle curve looks good, but a straight run is far easier to form and finish. If the ground falls steeply, plan steps or a landing instead of a steep slope.
Call your local utility location service before you dig, especially near a road or a drive.
Tools and materials
Hire a mixer and a plate compactor for a long path. For a short path, a wheelbarrow and hand tools will do. Buy a little extra concrete and gravel.
| Item | What it is for | Notes |
|---|---|---|
| Stakes, string and spray paint | Marking the route | Use string to check straight runs |
| Spade, shovel and wheelbarrow | Digging and moving spoil | Allow for spoil removal |
| Timber forms and screws | Shaping the slab | Use 100 mm boards for a 100 mm slab |
| Gravel and plate compactor | Base layer | Compact in thin layers |
| Screed board, float and broom | Levelling and finishing | A stiff broom gives grip |
| Edger and jointing tool | Neat edges and joints | Cut joints while concrete is soft |
How thick and how wide should it be
For a home footpath, 100 mm of concrete over 100 mm of compacted gravel is a sound standard. Use 150 mm where a vehicle may cross. A single person needs about 900 mm. Two people side by side need about 1200 mm.
Slope the path away from the house. A fall of about 1 in 50, which is roughly 20 mm over 1 metre, sheds water without feeling steep. Check the fall with a spirit level and a straight board. A path that holds water will stain, grow algae and turn slippery.
Worked example: how much concrete do you need
Take a path 10 metres long, 1.2 metres wide and 0.1 metres thick. That gives 10 times 1.2 times 0.1, which equals 1.2 cubic metres. Add about 10 percent for waste, taking you to about 1.32 cubic metres. A short pour leaves a weak cold joint in your path.
For more detail on thickness for other slabs, read our concrete walkway thickness guide and our concrete slab thickness guide.
Step by step: pour the sidewalk
1. Mark and dig
Mark both edges with paint and stakes. Dig out turf and topsoil to the full depth of base plus slab, which is about 200 mm for a standard path. Remove roots and soft spots. A firm, even dig gives a slab of even thickness, and even thickness resists cracking.
2. Set the forms
Fix timber boards along both edges. Drive stakes outside the boards every metre or so. Check the top of the form with a level. The top of the form sets the finished height, so take time here. Oil or dampen the inside face lightly so the boards come off cleanly later.
3. Lay and compact the base
Spread gravel in layers about 50 mm thick. Compact each layer before you add the next. A loose base settles later and the slab cracks over the hollow. Dampen the base lightly before you pour, so dry gravel does not suck water out of the fresh concrete.
4. Place reinforcement if needed
For most short garden paths, mesh is optional. For longer paths, paths on poor soil and paths near trees, mesh helps control cracking. Lay mesh on small chairs or stones so it sits in the middle of the slab, not on the ground. Overlap sheets by at least one full square.
5. Pour, screed and finish
Pour from one end and work back, so you do not walk through fresh concrete. Spread it with a shovel and tap the forms to remove air pockets. Screed with a straight board in a sawing motion across the forms. Float the surface to close it, then edge the sides. Cut control joints every 1.2 to 1.5 metres with a jointing tool. Finish with a light broom dragged across the width for grip. Do not overwork the surface. Overworking brings water and fine material to the top and weakens it.
6. Cure and protect
Cover the path with plastic sheeting or damp hessian once it is firm enough not to mark. Keep it damp for at least seven days. Keep foot traffic off for at least 24 hours, and keep heavy loads off for a week. Learn more in our guide to curing concrete and our drying and curing times guide.
What it costs and what moves the price
Price depends on length, access, digging, base depth, finish and local labour rates. Published guides for a plain broom finish often cluster around 6 to 12 dollars per square foot for professional work, with do it yourself materials only lower. Get local quotes that state thickness, base, joints, finish and spoil removal.
| Cost factor | Why it matters |
|---|---|
| Old path removal | Breaking and disposal add labour and skip costs |
| Poor soil or roots | Extra digging and a deeper base may be needed |
| Curves and steps | More forming time and more cutting |
| Long barrow runs | Slow delivery raises labour time |
| Decorative finish | Colour and stamping add material and skill |
Common mistakes to avoid
- Pouring on loose topsoil instead of a compacted gravel base.
- Adding extra water to make the mix easier to spread. Extra water weakens concrete.
- Skipping control joints, then blaming random cracks later.
- Finishing in rain, or pouring when frost is forecast overnight.
- Removing forms too early and chipping the fresh edges.
For a full list of traps, see our DIY concrete mistakes guide.
When to hire a professional
Hire a pro for a public footpath, a path with steps, a path over poor or sloping ground, or any job where a vehicle will cross. A contractor crew brings speed, and that matters on a long pour.
Aftercare
Sweep often and wash off mud before it stains. Treat algae with a cleaner made for concrete. If a joint filler fails, replace it before water gets under the slab. Our control joint spacing guide explains joint layout.
Frequently asked questions
How thick should a concrete sidewalk be?
Use 100 mm for a home footpath and 150 mm where vehicles may cross. Always add a compacted gravel base under the slab.
How wide should a garden path be?
Use 900 mm for one person and 1200 mm for two people side by side. Wider is better near a main door or a gate.
How far apart should control joints be?
Cut joints every 1.2 to 1.5 metres. Joints give cracks a planned place to form, so they do not wander across the slab.
Can I pour a sidewalk in sections?
Yes. Pour in bays between joints, and keep each bay to a size you can finish before the concrete stiffens. Plan the pour order before the truck arrives.
How long before I can walk on a new sidewalk?
Keep foot traffic off for at least 24 hours. Wait a week before heavy loads, and cure the slab for at least seven days for best strength.
Do I need a permit for a garden path?
A private garden path often needs no permit, but a public footpath or a path near a road may need approval. Check local rules before you dig.
Conclusion
A good sidewalk starts below the surface. Dig well, compact the base, set level forms, pour at the right thickness, joint it early and cure it with care. Do those steps in order and your path will stay level, safe and tidy for years. Rush the base or add extra water, and you will pay for it in cracks and repairs.
Sources
- Homeserve: How to Pour a Concrete Sidewalk
- Engineer Fix: How to Build a Durable DIY Concrete Path
- Engineer Fix: How Much Do Sidewalks Cost
- Metal America Concrete: Concrete Sidewalk Cost and 2026 Ranges
About the author
Kaleemullah Formulas use standard geometry and published bag yields; sources are linked in each article.